Inserting Images Into WordPress Posts or Pages
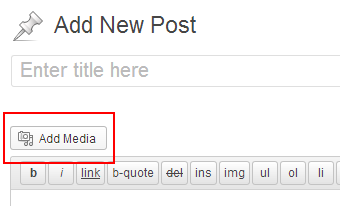
Using the Add Media within the add/edit post/page screens will give you access to the Media Library.
It will also allow you to upload images that will get auto-resized based on the set thumbnail values for the particular theme that you are working with.
You can set an image as “Featured” or insert it right within the post. When setting as Featured, the theme will have full control over placement and size, and the HTML that gets generated.
When “inserting into a post” you have a little more control. You can certainly decide where the image is placed, and you could choose from some set “classes” to decide on text wrapping, etc.
Step 1) Click the Add Media button.
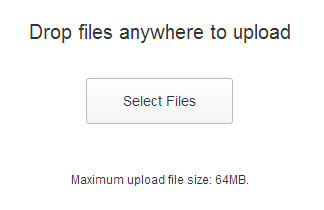
Step 2) Click the Select Files button.
Step 3) Locate the image on your computer, and click Open.
You can see the progress meter in the image slot itself, plus in the right side in the Attachment Details window.
You can click the Edit Image text link for basic cropping, and image flipping options. You can choose to have the changes applied to all of the thumbnails that were created during the upload process.
Step 4) Give the image a Title, and preferably a Caption, and Alt Text as well, for some potential SEO value. Some themes, but not many, will incorporate the Description value somehow.
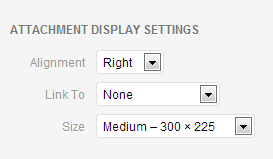
Step 5) Pick an alignment (center, left, right) or leave it as None.
Step 6) By default, the thumbnail image that gets inserted will link to the biggest version of itself (the originally uploaded file). That can be changed to link to an attachment page (some argue that will give the best chance at getting the image into Image search results, if it’s worthy of being there). You can also have a link to a custom URL, or nowhere at all.
Step 7) Finally, choose one of the pre-built sizes. Most often there will be a small square, and a couple sizes that are within aspect ratio of the original, and also a Full Size option. Medium is usually the default.
When using screenshots for tutorials such as this, Full Size should be used so there is no distortion.
Step 8) Click the Insert into post button.
You will be presented with code similar to the following:
The id’s and classes may be defined by the theme which will dictate how the image will ultimately look within the blog post (or page) on the site.
Some unique classes will be displayed specific to the image. They will include the image id number, 57 in the example above, which allows you to give the particular image a custom style that will not be used on other images.


.jpg)